Koromogae (衣替え) is a Japanese term that I have come to enjoy using recently…. In common terms it expresses the changing of robes or changing of clothing due to the seasonal flux. With bonsai this term is used to describe the technique of changing the entirety of the foliage variety on a particular tree. The tree in question is a Rocky Mountain Juniper that my teacher (Boon) was gracious enough to let me purchase from him.


The side of this tree that I have chosen as the back has interesting deadwood which gives it merit as a front but there is one drawback… When viewed from the backside, the tree leans distinctively in the opposite direction which is a big nono in bonsai design. A front that is trying to escape your sight of view does not make for a good focal point…. Now, before we get onto the grafting lets touch on a few broader topics.
Why Do We Graft?
- The foliage is not in scale to the size of the tree – many of the yamadori which we collect in the united states have large foliage which can be hard to manage when making a smaller tree. Even in Japan they have a native foliage on the collected trees called tohoku that is less dense and has larger needles. These are often grafted with Kishu or Itogawa foliage.
- Shinpaku foliage is typically easier to manage – you wire it down and it stays in place where as many of the collected yamadori foliage is so heavy that even after constant wiring it still droops and does not set in place.
- A personal reason but I prefer how it looks – its denser and greener. Those two contrast with the archaic deadwood of a yamadori quite well.
- To aid in preventing pests – Different varieties are more susceptible to certain pests than others. In California, Kishu are very susceptible to spider mite infestations while Itogawa rarely attracts them.
Why Am I Grafting This particular tree?
A mix of all four reasons that I quoted above but mainly because the tree is smaller sized and the Itogawa foliage I am grafting with will be much more in scale.

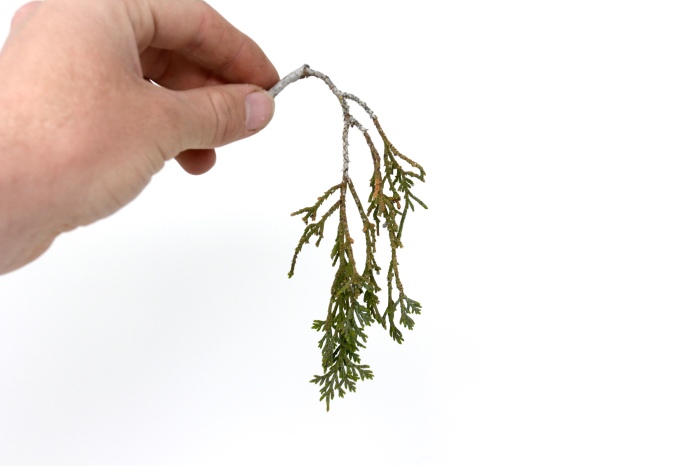
In my experience, like most collected junipers there is some Rocky Mountain foliage which is more cooperative than others. The kind I like grows tighter, more up right and does not droop down much at all.


Now, lets talk about the Shinpaku foliage I am using for the scions on this grafting operation. The particular variety I have chosen is ‘itogawa’ and probably one of the densest I’ve seen so far.


Now that we have covered some grafting philosophy lets get down to business. Here are some tools and supplies which I will be using to graft this tree. The most essential of them being an extremely sharp grafting knife – dull blades do not make for scions that take so always sharpen your blade prior to usage.

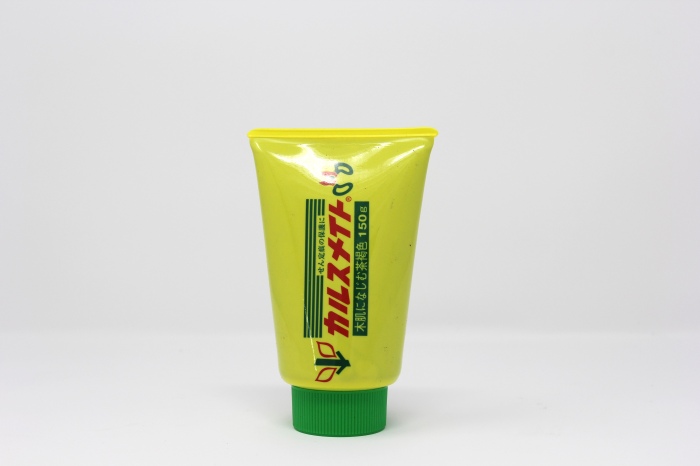
You will also need cutpaste of you’re choosing to seal the graft.

After you have your supplies handy, take your scion and rest it on your pointer finger while securing it with your other fingers. The cut end will be pointing outwards and make a slicing motion with your grafting knife – this will be your long cut which will make contact with the cambium layer on the tree. After this is done, turn it over and press it against a wood block to make your short cut.


Once this is done you can place your scion into the grafting bag followed by wet sphagnum moss and tie everything up with a piece of small aluminum wire. Junipers will absorb some water through their foliage so the added humidity helps keep things green and healthy while the graft takes.

Next – make a flap with your grafting knife where you would like to graft your scion. Make sure to go deep enough so that the scion and tree you are grafting can make contact through their cambium layers. The scion will then be inserted into this flap until there is no gap left behind.

You will then need to secure the graft in place with something – there are many ways of doing this. I am using a stretchy electrical tape available at most hardware stores and small zip ties. Seal your grafts with cutpaste and you are almost good to go.


Cover the bags with tape to shade the grafts then sit back and enjoy your hard work for a moment…only a moment.
Note – I did more grafts than are necessary to make this tree and I would highly recommend doing so. 100% success rate is great to strive for but not always a realistic measure.
I also feel it is important to touch on the fact that I don’t believe every tree should be grafted. Variety in a bonsai garden is very important and the larger foliage of yamadori can make for a pleasing image given that it is in scale with the tree.
If you are enjoying the blog so far please subscribe to my posts to see more of this work in the future.
You can also follow my work on various other social media – particularly Facebook and Instagram at this moment.

Reblogged this on Wolf's Birding and Bonsai Blog.
LikeLike
Kaya, Great post! I look forward to learning from you! I know you will become a great Bonsai resource on the web!
LikeLiked by 1 person
Thank you very much Joe! I don’t use the blog as much as I wish i had the time to, but I try to make a lengthy educational post whenever I get the chance.
LikeLike
thanks for sharing. I did not know the technique of he bag with moss
LikeLike