Koromogae Philosophy & Rocky Mountain Juniper

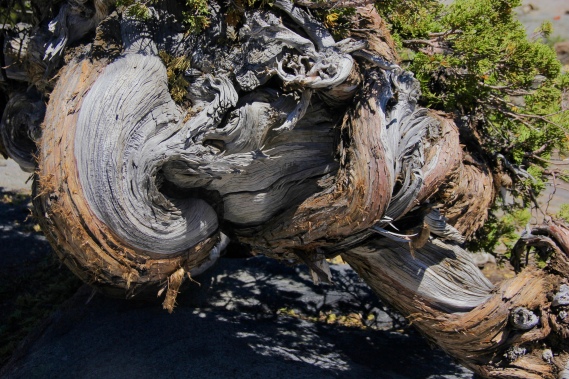
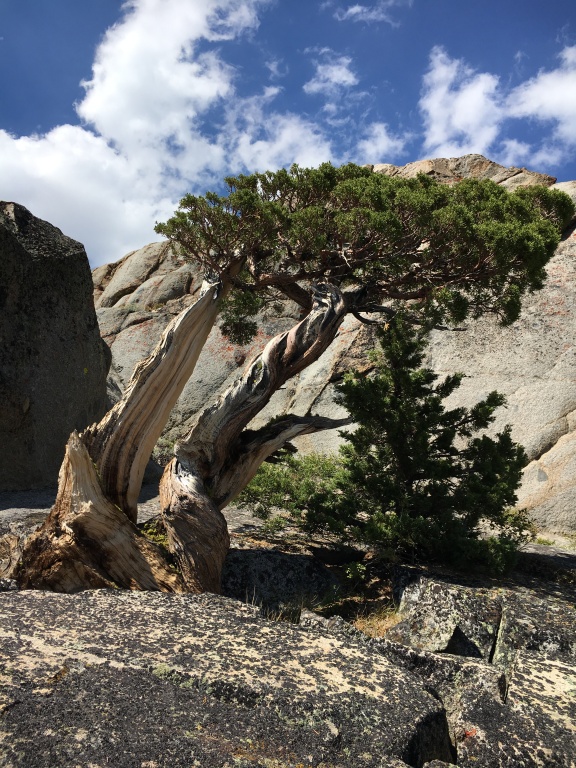
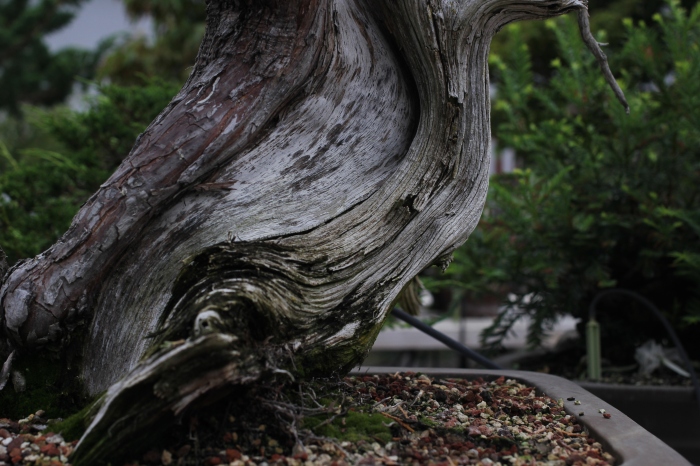
Koromogae (衣替え) is a Japanese term that I have come to enjoy using recently…. In common terms it expresses the changing of robes or changing of clothing due to the seasonal flux. With bonsai this term is used to describe the technique of changing the entirety of the foliage variety on a particular tree. The tree in question is a Rocky Mountain Juniper that my teacher (Boon) was gracious enough to let me purchase from him.

IMG_1904
Front Side Closeup
IMG_1899
Back Side 

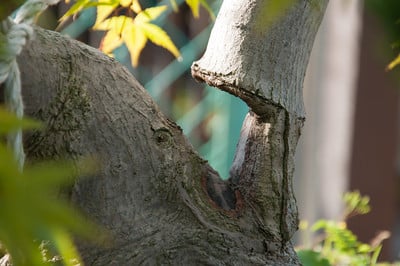
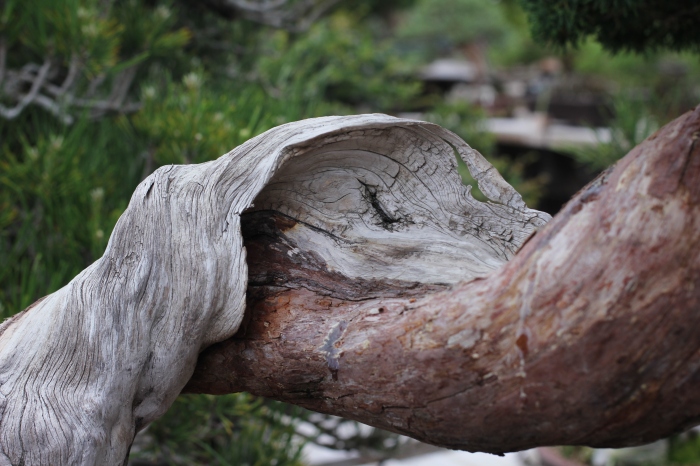
The side of this tree that I have chosen as the back has interesting deadwood which gives it merit as a front but there is one drawback… When viewed from the backside, the tree leans distinctively in the opposite direction which is a big nono in bonsai design. A front that is trying to escape your sight of view does not make for a good focal point…. Now, before we get onto the grafting lets touch on a few broader topics.

Why Do We Graft?

  1. The foliage is not in scale to the size of the tree – many of the yamadori which we collect in the united states have large foliage which can be hard to manage when making a smaller tree. Even in Japan they have a native foliage on the collected trees called tohoku that is less dense and has larger needles. These are often grafted with Kishu or Itogawa foliage.
  2. Shinpaku foliage is typically easier to manage – you wire it down and it stays in place where as many of the collected yamadori foliage is so heavy that even after constant wiring it still droops and does not set in place.
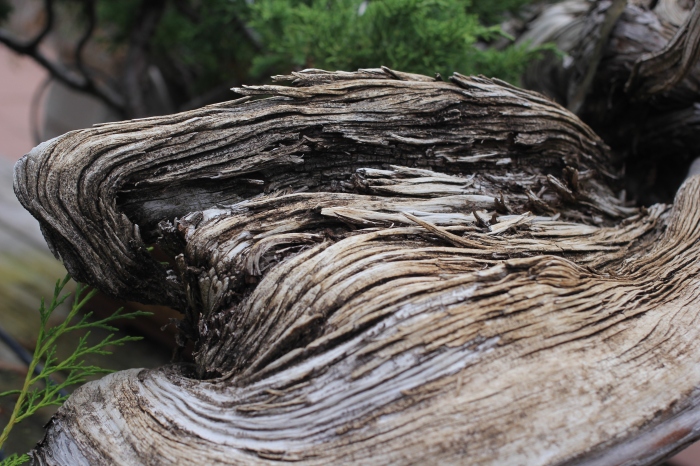
  3. A personal reason but I prefer how it looks – its denser and greener. Those two contrast with the archaic deadwood of a yamadori quite well.
  4. To aid in preventing pests – Different varieties are more susceptible to certain pests than others. In California, Kishu are very susceptible to spider mite infestations while Itogawa rarely attracts them.

Why Am I Grafting This particular tree?

A mix of all four reasons that I quoted above but mainly because the tree is smaller sized and the Itogawa foliage I am grafting with will be much more in scale.

fullsizeoutput_b98
Various Types of Rocky Mountain Juniper Foliage


In my experience, like most collected junipers there is some Rocky Mountain foliage which is more cooperative than others. The kind I like grows tighter, more up right and does not droop down much at all.

fullsizeoutput_b96
Dense and Upright Growing Rocky Mountain Juniper
fullsizeoutput_b97
Drooping Rocky Mountain Juniper Foliage

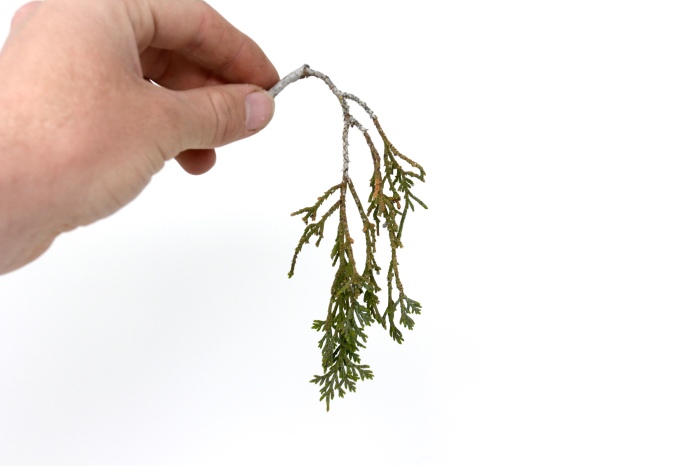
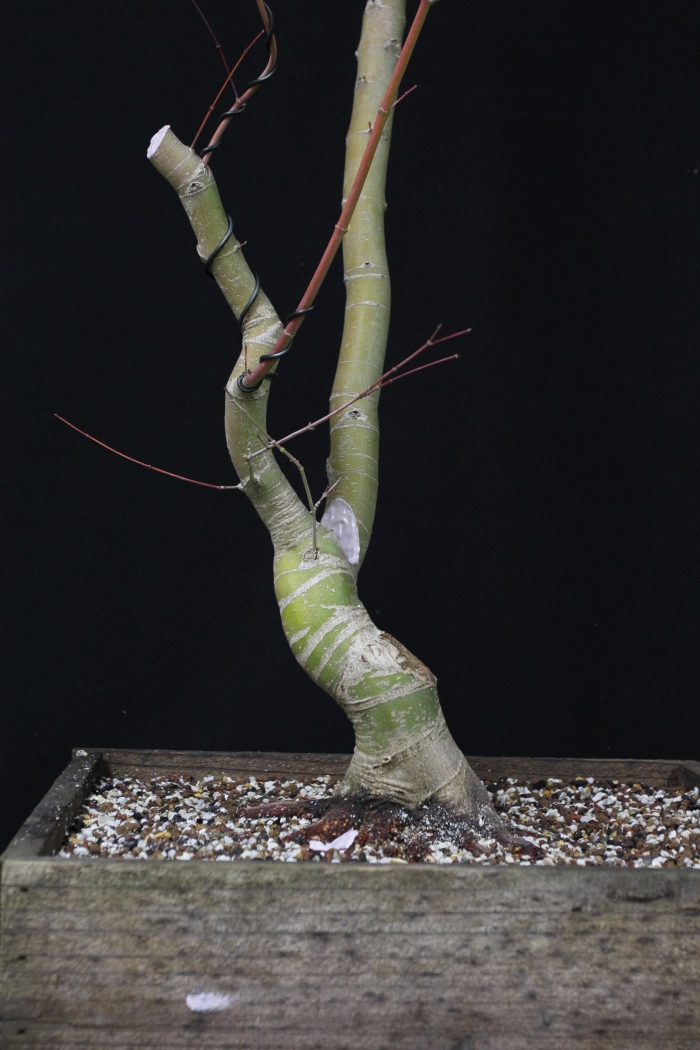
Now, lets talk about the Shinpaku foliage I am using for the scions on this grafting operation. The particular variety I have chosen is ‘itogawa’ and probably one of the densest I’ve seen so far.

fullsizeoutput_b99
Itogawa – Host of Many Future Scions. 
fullsizeoutput_b9a
Freshly Plucked Itogawa Scion 

Now that we have covered some grafting philosophy lets get down to business. Here are some tools and supplies which I will be using to graft this tree. The most essential of them being an extremely sharp grafting knife – dull blades do not make for scions that take so always sharpen your blade prior to usage.

fullsizeoutput_bf2
Grafting supplies 

You will also need cutpaste of you’re choosing to seal the graft.

fullsizeoutput_bf3
Cutpaste Liquid

After you have your supplies handy, take your scion and rest it on your pointer finger while securing it with your other fingers. The cut end will be pointing outwards and make a slicing motion with your grafting knife – this will be your long cut which will make contact with the cambium layer on the tree. After this is done, turn it over and press it against a wood block to make your short cut.

fullsizeoutput_bf4
Long Cut
fullsizeoutput_bf5
Short Cut
fullsizeoutput_bf6
Prepped Grafting Bag – Wet Sphagnum For Humidity 

Once this is done you can place your scion into the grafting bag followed by wet sphagnum moss and tie everything up with a piece of small aluminum wire. Junipers will absorb some water through their foliage so the added humidity helps keep things green and healthy while the graft takes.

fullsizeoutput_bf7

Next – make a flap with your grafting knife where you would like to graft your scion. Make sure to go deep enough so that the scion and tree you are grafting can make contact through their cambium layers. The scion will then be inserted into this flap until there is no gap left behind.

fullsizeoutput_bfa
Electrical Tape

You will then need to secure the graft in place with something – there are many ways of doing this. I am using a stretchy electrical tape available at most hardware stores and small zip ties. Seal your grafts with cutpaste and you are almost good to go.

IMG_2091
Grafts – All Secured and Sealed 


fullsizeoutput_bfc
Finished Product

Cover the bags with tape to shade the grafts then sit back and enjoy your hard work for a moment…only a moment.

Note – I did more grafts than are necessary to make this tree and I would highly  recommend doing so. 100% success rate is great to strive for but not always a realistic measure.

I also feel it is important to touch on the fact that I don’t believe every tree should be grafted. Variety in a bonsai garden is very important and the larger foliage of yamadori can make for a pleasing image given that it is in scale with the tree.


If you are enjoying the blog so far please subscribe to my posts to see more of this work in the future. 

You can also follow my work on various other social media – particularly Facebook and Instagram at this moment. 

https://www.facebook.com/kaya.moon.bonsai

https://www.instagram.com/moonlightbonsai/

Japanese Maples and Healing Large Wounds

I recently came across an interesting Momiji (Japanese Maple) project with nice subtle curves and slow elegant taper – great features for a raw stock Momiji.

IMG_1774
Momiji Before Work

Now you may have noticed one or two major details about this tree… 1. It is in major need of a repotting which luckily when these photos were taken was the perfect time to embark on this operation and 2. How do we successfully get rid of that huge sacrifice branch? Stay tuned and you will find out!

IMG_1780
Close Up – Bottom of Grow Box
IMG_1793
Close up of Roots After Removing Box Side

Can you say roots? further evidence that this tree was in need of a repotting.

IMG_1798
Raking Out the Top of the Rootmass

Typically we would start by raking out the bottom of the tree but in this case i wanted to begin by removing some of the weeds/moss and finding the nebari… Then onto the bottom. I use a single prong root hook to do this work and a 3 pronged root rake for the bottom.

IMG_1812
Japanese Maple Planted on a Board – 3 Pronged Root rake in Front

After raking out the bottom of the root-mass slightly I found a pleasant surprise – this tree had been planted on a board by the previous grower. This makes my job a lot easier.

Then I went on to remove some unsightly larger surface roots on this tree…

IMG_1816
Closeup of Roots We Remove

This root was emerging from underneath initially and then on a different plane than the rest of the nebari. When developing a good nebari on deciduous species we want to have all roots on the same plane or level. This is the way to develop a nice fused or “melted” nebari over time.

IMG_1815
Unnecessary Root

This root is crossing over a root that we would like to keep – not good for the future nebari by any means.

IMG_1814
Another Root I Removed

This root is crossing over another root that we would like to keep and growing inwards towards the trunk – this must be removed to develop a nice nebari in the future.

IMG_1820
Closeup of Roots

Now we have the root ball after removal of most unsightly and downward growing roots. Note: I did not remove as much roots as I could have or in some cases should have… At the moment I am most focused on healing the wound left behind from removing that large sacrifice branch and a lot of energy in bonsai is stored in the roots – Happy roots=happy tree.

IMG_1821
Growing Box – Prepped With Wire and Growing Medium

A second Note: Again, in the case of this tree I am most focused on healing that large wound we have been talking about. At this time there is no precedent set on developing ramification or shortening internodes. Larger particles and more pumice which both dry out quicker typically deliver more root growth which results in an overall stronger tree.

fullsizeoutput_9d3
Momiji After Potting

Here is a photo of the tree after the repotting was finished and before making any judicious cuts.

IMG_1829
Semi wedge cut

Here is a closeup of the cut that was made – the initial cut was made with a saw, then chisel and cleaned up with a sharp knife. This technique was brought to fame by the great Ebihara. He would typically do a wedge cut as seen below but i am experimenting with a more square cut to see if there is any advantage to this method of doing the cut. He also brought the nail and board technique of arranging and developing roots on deciduous tree to fame.

20111027-DSC0189-S
Ebihara Wedge Cut – Image Borrowed from https://bonsaitonight.com/

This puts us at an advantage in two ways – 1. We are using energy from two branches which means that come this spring there will be strong growth healing both sides of the cut 2. Doing this cut in two stages versus one also allows the tree to heal a smaller wound in 2 stages versus a large wound all at once which will result in a quicker closing cut.

IMG_1831
Enter a caption

Make sure to apply a liberal amount of cut paste or would sealant after the cut is cleaned with a sharp blade. IMG_1834

And the “finished” product – for now that is.

I plan to make a medium sized tree but the growth will be kept long for now to aid in the healing the wound left behind by the sacrifice branch.


If you are enjoying the blog so far please subscribe to my posts to see more of this work in the future. 

You can also follow my work on various other social media – particularly Facebook and Instagram at this moment. 

https://www.facebook.com/kaya.moon.bonsai

https://www.instagram.com/moonlightbonsai/

Ancient Trees of The Sierras

One of the most beautiful treasures of California is without a doubt the Sierra Nevada Mountain range. Littered with twisted conifers full of deadwood and intricate structure, this place is a gold mine for bonsai artists to study and instill into their trees and design principles.

fullsizeoutput_799
Looking out on the vast wilderness of the Sierras

One of the more sought after species in this area is the Sierra Juniper or Juniperus occidentalis. Known for it’s flaky red-orange bark, battered deadwood and natural curvature it is an excellent specimen to study. The harsh weather and environment of this mountain range is one of the many factors leading towards the interesting appearance of Sierra Juniper; older ones of the species landing themselves around the 3000 year mark you can imagine how breathtaking it is to view them in person.

fullsizeoutput_79a
Famous Sierra fittingly named “Twisted Juniper”

This Sierra Juniper above has been carefully studied and observed by many bonsai artists, hikers and nature enthusiasts over the years. One can’t even fathom what it has been through over the past few thousand years.

fullsizeoutput_79b
Closer look at the spiraling live vein and deadwood

I took it upon myself to venture up the mountain in hopes of viewing a Juniper I spied on the last trip but didn’t have a chance to view up close. Let me say that this small rock climbing expedition was well worth the effort. Upon closer inspection one can really begin to appreciate the spiraling twists of the live vein interacting with the feathered jin and shari.

IMG_7014
The Juniper quoted above

IMG_7015


Our last tree for this expedition definitely falls into the larger category of things. It’s name is T-Rex and simply put it is amazing and also again quite massive. Here you can see Matt standing next to it gazing at the deadwood for scale.

IMG_0885
“T-Rex”

fullsizeoutput_7a4

One of the great things about this tree is how many different examples of jin and shari are scattered throughout. Variously placed within the tree, no two areas of wood are identical.

fullsizeoutput_7a5
Is it possible to recreate this? I think not.

Jin and Shari oh my

This will be a simple blog post, more so a photo essay than anything else. I have officially moved to California and been residing here at Boons for a little under a week now. Between getting adjusted to the time change and copious work schedule I have had little time for blogging or social media.

While weeding the trees this morning I took a small break to capture some of the magnificent deadwood scattered throughout the garden. Now onto the photos…

IMG_0981IMG_0983IMG_0989IMG_0998IMG_1001IMG_1008IMG_1019IMG_1038IMG_1046IMG_0984

Now back to work, as time goes by and my skill level progress you can expect to see a bit more “exciting” content here on the blog. Thanks for reading.

Until next time.